


Switching from Windows to Linux can feel like stepping into a whole new world – one filled with a dizzying array of Linux distributions (distros), desktop environments, and unfamiliar terminology. But fear not: with the right guidance, transitioning to Linux can be an exciting and rewarding journey. In this guide, we’ll walk you through choosing a beginner-friendly distro, understanding Linux’s desktop environments and display servers (and how they compare to Windows), using tools like DistroWatch to explore options, testing Linux via live USBs, and even share personal experiences moving from an advanced distro (Manjaro) to a more beginner-friendly one (Linux Mint). Let’s dive in!
Choosing the Right Linux Distro
One of the first things you’ll notice is that Linux isn’t just one operating system – there are hundreds of distros (variations of Linux) maintained by different communities or companies. This is very different from Windows, which is a single product line from Microsoft. The good news is you have choice; the tricky part is deciding which Linux flavor suits you best.
Beginner-Friendly vs Advanced Distros: If you’re new to Linux, it’s wise to start with a distro known for ease of use. Linux Mint and Ubuntu are often recommended as top choices for beginners (Distro for “beginners” – Linux Mint Forums) (The best Linux distributions for beginners in 2025: Expert tested and reviewed | ZDNET). They come with user-friendly interfaces, plenty of pre-installed software, and large communities for support. For example, Linux Mint is praised for its modern yet comfortable interface and “works out of the box” experience – it includes full multimedia support (no need to hunt down audio or video codecs) and is extremely user-friendly (9 Best Linux Distros in 2025). In fact, Linux Mint is considered one of the best alternatives to Windows or macOS because it’s powerful and easy to use (9 Best Linux Distros in 2025). Ubuntu, on the other hand, has been a long-time favorite for newcomers due to its robust community and documentation; as one expert notes, it’s “still a great distro for newbies” even if other distros have become more beginner-centric in recent years (The best Linux distributions for beginners in 2025: Expert tested and reviewed | ZDNET).
By contrast, more advanced distros like Manjaro or Arch Linux appeal to users who want to tinker and learn the internals of Linux. Manjaro is an easier-to-use, pre-configured derivative of Arch Linux, but it’s still considered more technical than Ubuntu/Mint. One Linux forum user put it this way: “Mint is a fixed-point-release distribution, whereas Manjaro is a rolling-release distribution. Rolling-release means that you install the system once and you never have to reinstall, but on the condition that you keep your system updated.” (Manjaro vs Mint – Non-technical Questions – Manjaro Linux Forum). In practice, this means Manjaro (like Arch) gives you the latest software updates continuously – great for having cutting-edge features, but it also means you must be vigilant with updates and occasional troubleshooting. If you prefer stability and predictability, a fixed-release distro like Mint (which is based on the Ubuntu/Debian family) is a safer bet (Manjaro vs Mint – Non-technical Questions – Manjaro Linux Forum). As that same forum discussion concluded: “If you are unsure whether you are up for it or not – choose Mint. If you are up for it – Manjaro is an extremely rewarding experience… If something breaks you fix it… The greater risk, the bigger reward.” (Manjaro vs Mint – Non-technical Questions – Manjaro Linux Forum) (Manjaro vs Mint – Non-technical Questions – Manjaro Linux Forum). In short, Ubuntu/Mint offer a smoother ride for general use, while Manjaro/Arch offer a hands-on learning experience if you’re willing to get your hands dirty.
Distro Families and Package Managers: Linux distros can be grouped into families based on their lineage and package management systems. For example, Ubuntu and Mint belong to the Debian family, using Debian’s .deb packages and the APT package manager for installing software. Arch and Manjaro form another family, using the pacman package manager for .pkg.tar.zst packages. From a user perspective, both APT and pacman achieve the same goal (installing and updating software), but their syntax and philosophies differ. APT is known for its straightforward commands and huge curated repositories (plus PPAs for extra software on Ubuntu), whereas pacman is extremely fast and simple, supplemented by the Arch User Repository (AUR) for a virtually limitless supply of user-contributed packages. (Manjaro, for instance, includes a graphical tool called Pamac to make pacman and AUR usage easier (Comparison of major Linux package management systems – LinuxConfig) (Comparison of major Linux package management systems – LinuxConfig).) The choice of package manager might seem trivial now, but it can impact your experience – as one comparison notes, pacman is very lightweight and fast, but can be less intuitive for newcomers (especially when AUR is involved) (Comparison of major Linux package management systems – LinuxConfig). The good news: most beginner-friendly distros have app stores or software centers, so you don’t need to touch the command line for installing common apps unless you want to.
Other Considerations: There are other popular families too – for example, Fedora (which is upstream for Red Hat Enterprise Linux) uses the DNF package manager and often showcases very up-to-date software and the latest GNOME desktop. openSUSE is another, with the Zypper package manager. However, as a beginner, you don’t need to overwhelm yourself with every option. A sensible strategy is to start with one of the well-known beginner distros (Mint or Ubuntu are safe bets, perhaps Fedora if you’re curious), and stick with it for a while. As you grow comfortable, you can explore others. A website like DistroWatch can help you discover and research distributions.
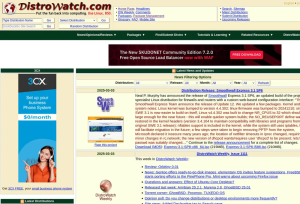
(Seeking the latest in Linux? There’s a right way and a wrong way to use Distrowatch | ZDNET) Screenshot of the DistroWatch.com homepage (March 2025), which provides news and a searchable list of Linux distributions.
Using DistroWatch: DistroWatch is a famous website that tracks and catalogs hundreds of Linux distros. It features a “Page Hit Ranking” showing which distro pages are getting the most traffic on the site. Note: This is not a direct indicator of usage share or quality – it simply reflects interest from DistroWatch visitors (Seeking the latest in Linux? There’s a right way and a wrong way to use Distrowatch | ZDNET). (For example, as of now Linux Mint often tops the DistroWatch rankings, beating Ubuntu, but that doesn’t necessarily mean Mint has more users overall (Seeking the latest in Linux? There’s a right way and a wrong way to use Distrowatch | ZDNET).) What DistroWatch is great for is reading descriptions and reviews of each distro and seeing what’s newly released. Their “News” section highlights new version releases (e.g. when a distro updates its version). If you’re undecided, you can browse the top 5 or 10 distros on DistroWatch and read each one’s summary. Pay attention to whether a distro is aimed at beginners or advanced users, what desktop environment it uses by default, and its update philosophy (rolling vs fixed release). This will give you a feel for which ones align with your needs.
In summary, for most Windows switchers, starting with an easy distro like Mint or Ubuntu is wise. They provide a familiar experience, large community support, and require minimal post-install tweaking. As you grow more confident, you can try out others – perhaps on a spare machine or in a virtual machine – to see what fits your workflow best. The beautiful thing about Linux is that you’re never locked in; you can reinstall or switch distros freely (most are free of cost). Use that freedom to your advantage.
Desktop Environments and Display Servers Explained
When you use Windows, you generally only see one desktop interface – the taskbar, Start menu, Windows Explorer, etc. (Sure, Windows 10/11 have “light” vs “dark” themes and minor customization, but the overall desktop paradigm is the same for all Windows users.) In Linux, however, the desktop environment (DE) – essentially the graphical user interface and experience – can vary dramatically between distros (or even within the same distro). Understanding this separation of the interface from the OS is key to making sense of Linux.
Desktop Environments: KDE, GNOME, Xfce, and more
A desktop environment encompasses the GUI shell (panels, menus, system tray), window manager, and often a suite of default applications. Linux offers many DE options, each with its own design philosophy:
KDE Plasma: A feature-rich environment that offers a traditional desktop experience. It has a start menu (launcher), taskbar, system tray – elements very familiar to Windows users – and is highly customizable. KDE is known for allowing you to tweak anything to your liking, and despite its depth, it’s quite efficient with resources. If you like Windows 7’s style or Windows 10’s flexibility, KDE will feel comfortable (and indeed, many say KDE can be made to look more Windows than Windows if you wish!). An example analogy: choosing KDE vs GNOME vs Xfce is like choosing a car’s interior style – “each of these desktop environments provide the same underlying engine (Linux) but with different design elements,” like one car having a different dashboard layout than another (9 Best Linux Distros in 2025). KDE’s layout is the “traditional dashboard” in this analogy – recognizable and loaded with controls. One source notes that KDE “offers a more traditional desktop experience with recognizable launchers, especially for users transitioning from a Windows environment” (〖KDE Vs GNOME Vs XFCE: Comparing Detskop Environments and Making the Best Choice〗 BLOG ᐈ Host-World.com ).
GNOME: This is the default desktop for Ubuntu and Fedora, among others. GNOME takes a more modern approach, with a simplified interface focused on productivity. Instead of a traditional taskbar + start menu, GNOME has an overview mode (triggered by the “Activities” or Super key) where you can see open windows and launch apps. It might feel foreign at first if coming from Windows, but it’s designed to minimize distractions. Think of GNOME as a car with a futuristic, minimal dashboard – initially strange, but very sleek once you get used to it. In fact, many users report that after adapting to GNOME’s workflow, it “makes perfect sense” and they even wonder why other OSes don’t do some things the same way (The best Linux distributions for beginners in 2025: Expert tested and reviewed | ZDNET) (The best Linux distributions for beginners in 2025: Expert tested and reviewed | ZDNET). GNOME emphasizes clean design and has fewer built-in customization knobs (though you can extend it with tweaks and extensions). It’s a bit like macOS in philosophy (less is more). That said, GNOME can be slightly heavier on system resources than some alternatives.
Xfce: A lightweight, no-frills desktop environment that will appeal if you have older hardware or prefer a snappy interface with a classic feel. Xfce has a traditional layout (panel, application menu, etc.) and is often described as being akin to a “classic Windows” or even Windows XP-style experience (What is the difference between GNOME, KDE, Xfce and LXDE? – Ask Ubuntu). It doesn’t have flashy effects by default, but it’s highly stable and efficient. Xfce stands out for its intuitive navigation, making it accessible for users familiar with standard Windows operating systems (〖KDE Vs GNOME Vs XFCE: Comparing Detskop Environments and Making the Best Choice〗 BLOG ᐈ Host-World.com ). In other words, if you install an Xfce-based distro (like Xubuntu or Linux Mint Xfce edition), you’ll find the interface straightforward and not too unlike Windows in basic usage – just faster and simpler.
Cinnamon and MATE: These two are worth mentioning together. Cinnamon is the default desktop environment for Linux Mint (created by the Mint team), and MATE is a continuation of the old GNOME 2.x desktop. Both provide a traditional menu+panel experience. Cinnamon in particular was designed to be familiar to Windows users – Mint’s developers wanted to offer an environment that didn’t confuse newcomers. It has a start menu (Mint Menu), taskbar, and generally all the conventional desktop features. MATE is similar in approach (it actually started as “GNOME 2 revived” after GNOME 3 took a different path). These environments are great for beginners because they behave how one would expect a desktop to behave – no surprises. In that ZDNet roundup, the author specifically praises Linux Mint with Cinnamon as the best beginner-friendly setup, in part because “its interface is easy to use” and it gives you everything you need without cost (The best Linux distributions for beginners in 2025: Expert tested and reviewed | ZDNET). If you’re coming straight from Windows 7 or Windows 10, Cinnamon will likely be the least disruptive change.
Others: There are many more desktop environments – LXDE/LXQt (ultra-lightweight desktops suitable for very old PCs), Budgie (modern and elegant, used in Solus and Ubuntu Budgie), Pantheon (elementary OS’s sleek Mac-like desktop), etc. There are also tiling window managers like i3wm, which are not full desktop environments but rather minimalist interfaces that tile windows on the screen (no overlapping) and are controlled mainly with keyboard shortcuts. Tools like i3 are primarily for advanced users who want maximum performance and a very customized workflow. i3 is a tiling window manager primarily targeted at advanced users and developers (How to install minimal i3 on my fedora server 35 – Fedora Discussion) – if you ever see screenshots of a Linux desktop with no obvious taskbar and lots of terminals or apps neatly arranged in a grid, that’s likely a tiling WM. These can be awesome for productivity (power users swear by them), but as a new Linux user you probably won’t start there. Still, it’s good to know such options exist because it highlights the extreme flexibility of Linux – you can have a GUI as simple or as fancy as you want.
One really cool aspect of Linux is that the desktop environment is usually *swappable*. Unlike Windows, where you’re essentially stuck with Microsoft’s interface, on Linux the GUI is just another piece of software. Many distros offer editions or “spins” with different DEs. For example, Ubuntu has official flavors: Kubuntu (Ubuntu with KDE Plasma), Xubuntu (with Xfce), Lubuntu (with LXQt), etc. Fedora offers spins with KDE, Xfce, MATE, etc. Manjaro likewise offers official editions (XFCE, GNOME, KDE) and community editions (Cinnamon, MATE, i3, and more) (9 Best Linux Distros in 2025) (9 Best Linux Distros in 2025). Under the hood, it’s the same OS, just a different interface on top – like having the same car engine but a different body style (9 Best Linux Distros in 2025). This means if you don’t like how your Linux desktop looks or behaves, you can often change it without switching distros entirely (by installing another DE on your system, or choosing a different spin). For beginners, the simplest method is to pick a distro that comes with a DE you prefer out-of-the-box. But rest assured, you’re not locked in – you have the freedom to experiment.
How do these compare to Windows? In summary, Windows’ single desktop paradigm most closely resembles something like KDE or Cinnamon (where there’s a taskbar, start menu, system tray). If you want minimal learning curve, choose a distro that uses one of those. If you’re okay adapting to a new paradigm for potential workflow improvements, you might try GNOME. Linux also allows multiple user accounts to use different environments on the same system (one user could log in with Xfce, another with GNOME, etc., if both are installed). Windows doesn’t offer that kind of variety – it’s one-size-fits-all. On Linux, the choice is yours.
Display Servers: X11 vs Wayland
Another concept you might come across is the display server or display server protocol. This is the layer beneath the desktop environment that handles the drawing of windows on the screen and coordinates input (keyboard/mouse). For decades, Linux (and UNIX) systems have used the X11 display server (also called X Window System). However, in recent years there’s been a push toward a newer display system called Wayland. As a new user, you don’t need to interact with X11 or Wayland directly, but it’s helpful to know what they are – especially if you see references to them or need to troubleshoot a graphics issue.
X11 (X.Org Server): This is the traditional display server that has been around since the 1980s. It’s very mature and feature-rich (including network transparency – the ability to run an application on one machine and have it display on another). Virtually all Linux software over the years was built to work with X11. However, X11’s design is aging; it has a lot of legacy code and some security limitations (any X application can snoop on what any other X application is doing, which is not ideal from a security standpoint). It wasn’t designed with modern compositing effects or high-DPI displays in mind, and while it has been extended a lot, there are some things it can’t easily fix due to its architecture (Ask HN: What is the misunderstood difference between X-Windows …).
Wayland: Wayland is a newer protocol (with implementations like weston and others) intended to eventually replace X11. Wayland is designed to be simpler, faster, and more secure than X11. It cuts out the middleman in rendering – instead of apps talking to an X server which then talks to the compositor, in Wayland the apps talk directly to the compositor (which is often part of the desktop environment) (Why Use Wayland versus X11?) (Why Use Wayland versus X11?). This reduces latency and overhead, meaning things like window dragging, animations, and gameplay can feel smoother under Wayland. Wayland also prevents applications from eavesdropping on each other’s input or windows, improving security by design (Advantages of Wayland over X11 | Linux.org). In short, Wayland offers “improved performance, reduced input lag, and a cleaner design compared to X11” (Advantages of Wayland over X11 | Linux.org). Sounds great, right?
The catch is that Wayland is still relatively new and not every application has full support for it yet. As of 2025, most major Linux distros have Wayland available, and many use it as the default in certain configurations (for example, Fedora’s default GNOME session has been on Wayland for years; Ubuntu’s default GNOME uses Wayland by default on supported hardware since 21.04; KDE Plasma’s Wayland support has matured greatly as well). However, some desktop environments (like Linux Mint’s Cinnamon, as of this writing) still use X11 by default, because they haven’t completed a Wayland transition. Also, certain applications or drivers may work better on one vs the other. For instance, NVIDIA’s proprietary graphics drivers historically had issues with Wayland, though recent versions have improved support.
For a Windows user, think of it this way: On Windows, the display server is an internal component you never have to think about – it’s just part of Windows’ GUI system. On Linux, you have two major ones in use (X11 and Wayland), and you might encounter options to choose between them on the login screen. If you run into an application that doesn’t capture your screen properly or a program that won’t run under Wayland, you can often log out, select an “X11 session” and log back in to use the X server for compatibility. Conversely, if you want the latest in smooth animations and security, you’ll want to use Wayland where possible. The good news is that these details are usually handled by the distro: you’ll automatically log into whichever is the default (and you may not even notice any difference in general use). Over time, expect Wayland to become the standard. In summary, Wayland is the new generation display server that aims to eventually supersede X11, bringing better performance and security, but X11 is still around for compatibility and will be until Wayland covers all use-cases.
(Fun fact: X11 is so old that it predates Windows 3.0 – it’s been in use since 1987! (Why Use Wayland versus X11?) It served us well, but just as Windows transitioned from the old GDI graphics system to newer compositors over time, Linux is transitioning from X to Wayland.)
Getting Started with Live USBs
One of the greatest things about Linux distros is that most of them can be tested without installing anything on your hard drive. This is usually done via a Live USB (or Live DVD). Essentially, you write the Linux distro’s ISO image to a USB flash drive, boot your computer from USB, and voilà! – Linux runs directly off the USB, allowing you to try the desktop, included programs, and check hardware compatibility. When you’re done, you remove the USB and reboot, and your Windows is back like nothing happened. This is fantastic for trying multiple distros and seeing which one you like, before committing to an install.
Here’s a step-by-step guide to test drive Linux using live USBs:
Download the ISO image of the Linux distro you want to try. ISO images are disc images that contain the entire operating system. You can get these from the distro’s official website (for example, Ubuntu’s ISO from ubuntu.com, Mint’s from linuxmint.com) or via links on DistroWatch. Make sure to download the correct architecture (typically 64-bit aka x86_64). It’s also a good practice to verify the download (many sites provide checksums) to ensure the file isn’t corrupted.
Create a bootable USB drive from that ISO. Simply copying the file to a USB won’t work; you need a special tool to make the USB bootable. Two popular tools for this are Rufus and Ventoy:
Rufus: Rufus is a lightweight, free, open-source utility for Windows that helps format and create bootable USB drives (Rufus – Creating boota… | FileWave KB). It’s very straightforward – you select your USB drive, select the ISO, and click start. Within minutes you’ll have a bootable Linux USB. Rufus is widely used for creating installation media for Windows and Linux ISOs alike (Rufus – Creating boota… | FileWave KB). If you only plan to try one distro at a time, Rufus is an excellent choice.
Ventoy: Ventoy is another awesome open-source tool, and it works a bit differently. With Ventoy, you install Ventoy onto the USB drive once, and then you can just copy as many ISO files as you want onto the USB. When you boot from that USB, Ventoy presents a menu letting you pick which ISO to boot (ventoy | Linux.org). This means no reformatting the USB each time you want to try a different distro – a single Ventoy USB can hold dozens of ISOs (limited only by the size of the drive) and let you choose between them at boot. As the Ventoy documentation says: “With Ventoy, you don’t need to format the disk again and again; just copy the ISO file to the USB drive and boot it.” (ventoy | Linux.org). This is incredibly convenient if you want to compare multiple distros or keep a “toolbox” USB with various live systems (e.g., one USB with Mint, Ubuntu, Manjaro, and even Windows installers all together). Ventoy works on Windows and Linux, but if you’re coming from Windows you’d use the Windows installer to prep your USB.
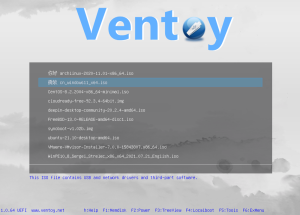
(ScreenShot . Ventoy) Ventoy boot menu example: a single USB drive with multiple ISO images (Linux and others) – the user can select which OS to boot at startup.Both Rufus and Ventoy are reliable. If you’re only interested in one distro for now, Rufus is a one-and-done solution. If you plan on sampling many flavors of Linux, Ventoy will save you time. (It’s worth noting there are other tools too, like balenaEtcher which is cross-platform and very user-friendly, but the two above were specifically recommended.)
Boot from the USB: This part depends on your PC. You’ll need to restart and enter your BIOS/UEFI boot menu. Typically, this involves pressing a key like F12, F10, Esc, or Del immediately when the PC powers on (the exact key varies by manufacturer). From the boot menu, select your USB drive. If all goes well, you’ll see either the Ventoy menu (if you used Ventoy) or the distro’s live boot menu. Select the option to “Try ___ without installing” (most distros default to a live session).
Experience the Live Linux Environment: The Linux system should boot up and land you on a desktop – all running from the USB. You can poke around the applications, connect to Wi-Fi, surf the web, play with settings, and generally see if you like the look and feel. Keep in mind that running off a USB (especially USB 2.0 drives) is slower than an installed system on an SSD. So if things feel a tad sluggish, don’t judge the distro’s performance too harshly. This is just due to the USB bandwidth and the fact that the entire OS is running from memory. Also, any changes you make or files you create in a live session typically will not persist after a reboot (unless you set up persistent storage, which is an advanced topic). The live session is mainly for demo and testing purposes.
Test Hardware Compatibility: During the live session, check that your important hardware works – can you connect to the internet (Wi-Fi or Ethernet)? Does sound work? If you have special hardware (graphics card, printer, etc.), see if it’s detected. Linux has excellent driver support for most hardware these days, but it’s smart to verify. If something isn’t working on the live USB, it might require additional drivers or tweaks after install – a quick web search can confirm if others have the same hardware working on that distro.
Install (Optional): If you decide that this Linux distro is a keeper, you can launch the installer which is usually an icon on the desktop or a menu option in the live environment. The installer will guide you to either replace Windows or (more commonly for switchers) install Linux alongside Windows (dual-boot). Dual-booting lets you choose either Windows or Linux each time you start your computer, which is great if you want to ease into Linux gradually. Just be sure to have backups of your important data before installing, as with any OS installation step.
Repeat as Needed: Not sold on that distro? Shutdown, try another one! This is where Ventoy shines – you could reboot and try a different ISO from the menu without re-prepping any USB. Exploring is part of the fun. Some people test 5+ distros before settling on one. Each distro has its own personality, so it’s worth trying a few.
Practical tip: Use a decent USB drive (USB 3.0 speed if possible) of 4GB or larger (many distros’ ISOs are 2GB to 4GB in size nowadays, so an 8GB or 16GB stick is ideal). Also, if your system is fairly modern, make sure to boot the USB in the proper mode (UEFI vs Legacy BIOS) depending on your preference and how your Windows is installed (most Windows 10/11 are UEFI). Most live USBs will boot either way, but if one mode fails, try the other.
Personal Experiences: From Manjaro to Linux Mint
Everyone’s Linux journey is a bit different. I’d like to share mine, especially since it highlights the contrast between starting with a more advanced distro and then finding comfort in a beginner-friendly one.
When I first decided to switch from Windows to Linux, I was adventurous (or so I thought!). I had heard great things about Manjaro – that it was cutting-edge, highly customizable, and had a great community. Manjaro is based on Arch Linux, but unlike Arch, it comes with an installer and some sane defaults, making it easier than Arch while retaining that rolling-release freshness. I installed Manjaro with the KDE Plasma desktop. The installation went smoothly, and soon I was staring at a beautiful Plasma desktop, amazed by the level of control I had over the system. Manjaro gave me access to Arch’s repositories and the AUR, which meant virtually any software I could think of was just a command (or click) away. I learned a lot about Linux in those initial weeks – how updates work in a rolling distro, how to edit config files, how to use the pacman package manager, etc. It was, as some say, a “rewarding experience” because it taught me the “ins and outs” of my GNU/Linux system (Manjaro vs Mint – Non-technical Questions – Manjaro Linux Forum). Manjaro’s community forums were helpful whenever I ran into an issue.
However, I also discovered the flip side: because Manjaro (and Arch) always update to the latest packages, occasionally something would break or require manual intervention. For example, one day a new update to the graphics stack caused my desktop to not start correctly – I was dropped to a command line login. It wasn’t the end of the world (I learned how to troubleshoot it by updating some GPU driver packages via pacman), but it was a reminder that this system expects you to be hands-on. Manjaro is “as stable as you make it” – those were words I’d read on the forum (Manjaro vs Mint – Non-technical Questions – Manjaro Linux Forum), and now I understood them. If I wasn’t careful with updates or if I installed an incompatible AUR package, I had to fix it myself. Being moderately tech-savvy, I managed, but it did cost me time.
After a while, I realized that what I personally wanted was a system that required less tinkering day-to-day. I do enjoy learning and tweaking, but I also needed my computer to “just work” for my regular tasks (work documents, web browsing, media, etc.) without frequent attention. That’s when I decided to try Linux Mint (Cinnamon edition). Mint is based on Ubuntu’s long-term support base, meaning it inherits a very stable foundation. The installation was effortless and, impressively, everything worked out of the box. My Wi-Fi, sound, even my printer – all detected and configured during install or with a quick driver tool afterward. Mint felt immediately comfortable. The Cinnamon desktop has a layout similar to Windows 7’s: a familiar Start menu analog, taskbar with icons, system tray, etc. The learning curve was almost nil. I also noticed the default selection of software was excellent for daily use – Firefox for web, LibreOffice for office tasks, a media player, etc. Mint even includes a utility to easily install missing codecs with one click, though nowadays it ships with most codecs by default, so I could play movies and MP3s without hassle (9 Best Linux Distros in 2025).
Over the next few weeks using Mint, what struck me was how uneventful it was – and I mean that in a good way! Updates came through the Update Manager and installed smoothly (Mint is conservative with updates and even lets you choose update policies). I never had a situation where an update broke my system. If I needed software, the Software Manager provided a simple app store interface, and APT (the command line package manager) felt very straightforward as well. In short, Mint required very little maintenance. As a bonus, because Mint is Ubuntu/Debian-based, if I ever needed help or tips, I could search for Ubuntu solutions and they usually applied to Mint as well (the ecosystems are nearly identical). The user base for Ubuntu/Mint is huge, so answers on forums or StackExchange were plentiful.
I found that I was more productive on Mint simply because I was spending zero time fighting the OS. That aligns with a comment I once read: “If you want to use Linux as an appliance (just use it to get stuff done), you’re probably better off with Mint. If you want to learn the system deeply, Manjaro can be more rewarding.” (Manjaro vs Mint – Non-technical Questions – Manjaro Linux Forum). After experiencing both, I couldn’t agree more. Manjaro/Arch gave me insight into Linux’s inner workings and latest software, but Mint gave me a stable daily-driver that let me forget about the OS and focus on my work.
It’s worth noting that this is my experience – others have gone the opposite route (starting on Ubuntu/Mint, then moving to Arch to expand their knowledge). There’s no right or wrong; it’s about what balance of stability vs. cutting-edge, simplicity vs. control you want. For me, Mint hit the sweet spot for general use. I still have a Manjaro installation on a secondary partition, and I boot into it when I feel like playing around or want to check out the newest KDE Plasma version, for example. But for getting things done with zero fuss, I stick to Mint.
Bottom line: Don’t feel bad if you try a distro like Manjaro or Arch and find it overwhelming – that’s normal. Distros like Mint, Ubuntu (or others like Zorin OS or Pop!_OS which also target newcomers) exist to make the transition from Windows as smooth as possible. In my case, after the initial “arch adventure,” I appreciated the polish and stability of a Debian-based system. It’s all about using the right tool for the job: if your goal is a hassle-free desktop, a newbie-friendly distro is the way to go.
Conclusion: Embrace the Linux Journey
Transitioning from Windows to Linux is both exciting and a bit intimidating – you’re not just learning a new OS, you’re entering a new ecosystem with its own culture and way of doing things. Remember that there’s a huge community out there and countless resources (forums, YouTube tutorials, wikis like Ubuntu’s or Arch’s) to help you every step of the way. You’ll likely hit the search engine with questions like “How to do X on Linux” – and more often than not, someone has asked it before and you’ll find your answer quickly.
A few final tips for success:
Take it slow: It’s okay to dual-boot and keep Windows around at first. You can gradually move your workflows to Linux. Having the safety net of Windows for a while can reduce pressure.
Leverage the community: Linux users are generally enthusiastic to help newcomers. Sites like AskUbuntu, Reddit’s r/Linux4Noobs, and distro-specific forums are great places to ask if you get stuck.
Don’t be afraid of the terminal, but know you can avoid it initially: The command line is a powerful tool on Linux (much more useful than Command Prompt on Windows), but thanks to modern desktop environments, you can do almost everything with GUI tools now. Over time, you might pick up some commands for efficiency – but you don’t have to at the start.
Security and updates: One refreshing change is that Linux doesn’t force-restart for updates like Windows, and you won’t need antivirus in the same way. Still, keep your system updated for best results (especially security patches). Rebooting is only needed when the kernel or low-level components update – and even then, you’re in control of when.
Enjoy the freedom: Try out different apps. For almost any Windows software, there’s an alternative in Linux (and often it’s free and open-source). LibreOffice in place of MS Office, GIMP for Photoshop, Thunderbird or Evolution for email, Steam for gaming (Proton has made many Windows games playable on Linux), etc. You’ll discover a lot of high-quality software in the Linux world. And of course, if you really need a specific Windows program, you can explore Wine or virtualization – but that’s beyond this guide.
In the end, switching to Linux is about taking back control of your computing experience. You can tailor your system exactly how you want it – whether that means a glossy desktop that looks like something out of sci-fi, or a minimalist setup that revives a decade-old PC, or anything in between. Unlike Windows, Linux puts you in the driver’s seat for everything. That can be daunting at first, but also incredibly empowering.
So, welcome to Linux! Choose a distro, fire up a live USB, and happy exploring. You might just find (as many of us have) that you never want to switch back. (Seeking the latest in Linux? There’s a right way and a wrong way to use Distrowatch | ZDNET)